This blog is about marketing, business and entrepreneurship. This particular post might seem a little off-topic but I am sure it will come handy for many of my readers.

If you are running a blog, starting to sell a product on amazon/etsy or doing any kind of business online you will come to a point where you would need images for your venture. Unfortunately you can’t just grab an image on Google search and use and you may not be able to hire a professional photographer to do some shots for you. But no fear, Alex is here 😉
Four Ways Of Getting Images
I do a lot of stuff online and I am constantly searching for new images that I could use. There are a few ways to find images: find the free ones, buy images, hire a photographer or make your own images.
1. Finding free images is very hard because most images come with specific copyrights. Often you’d have to credit the photographer which is not always possible. If you look at Extra Paycheck homepage you would see “Recent Posts” with featured images and I simply can’t insert a credit to the creator in those images, it would also be impossible to insert a link (which is often required). Another issue is that not all free images are actually free. You may stumble upon an image on Flickr which claims to be free but in reality some random person uploaded someone else’s image to Flickr and told everyone to use it. That’s a lawsuit waiting to happen.
2. Buying images can be an option. However, if you create a lot of online content you might end up spending way too much money on images. On top of that, many paid images also require that you credit the author unless you buy exclusive rights at $200+ per image… getting more and more expensive.
3. Hiring a photographer could also be a solution but now we’re getting into really expensive stuff. Also you can’t possible call a photographer and ask him/her to come over every time you are writing a new blog post or listing a new product for sale.
4. This leaves us with the last option – creating our own images. I know this can sounds daunting and out of this world but it shouldn’t. I am not a photographer by any means but I think the photos I take are actually pretty decent. If I can do it, so can you. Let’s start!
Creating Your Own Professional Images
Before we begin I would like to mention that you do not need to be a professional photographer and you don’t need expensive equipment to create amazing images for your product or your blog. In fact, you can get amazing results for free (or almost).
Step 1: The Light Box
I used to place the items I wanted to photograph on a table or another flat surface. The problem with this is there’s usually not enough light for the item to “pop-out” and there is always something in the background that ruins the photo or at least distracts us from the main item.
After many failed attempts of making a nice photo on the table I decided to look for a light box. Some of them go for cheap ($40 or so), more professional ones can cost up to a few hundred dollars. I have decided to create my own light box using supplies found around the house (talk about low price equipment!).
The light box will get rid of the distracting background and let you create whichever background you want, this is crucial especially if you want to take product shots for Amazon as they require an image on WHITE background. A light box will also allow us to control the light and shadows, making the image that much more professional.
Here is what you will need to create a light box:
- A cardboard box (make sure it’s big enough so your bigger items fit in it)
- Scotch tape
- Scissors or/and a cutting blade
- White fabric. I used a pillow case, you can also use a white XXL t-shirt from Walmart’s $3 clearance.
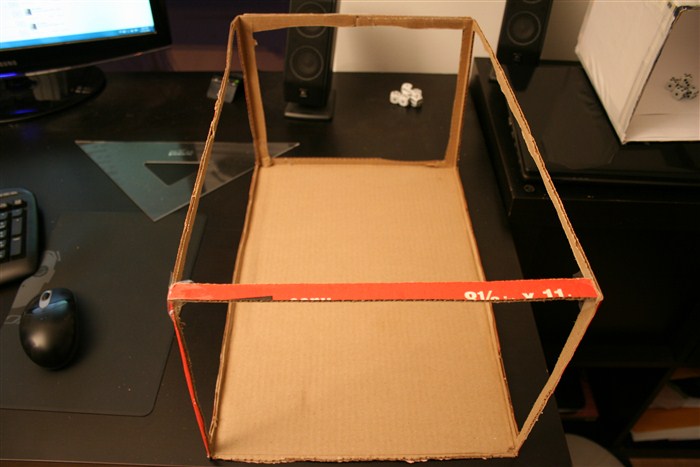
I had an old Staples box so I used it:

Cut the box!

Now cut the insides of the four sides as well as the top of the box, leaving the bottom intact. Also make sure to leave wide borders 2-3cm (1 inch) – this is where we will attach the fabric. In the example below I made my borders very thin and the box came out a bit unstable and hard to work with. Once again, leave the borders a little wider so it will be easier to work with.
Measure And Cut The Fabric
For this step you can actually use white paper, however I suggest using fabric. Fabric is long lasting and it won’t rip like paper. Also the fabric let’s the light through in a much better way than paper. As I mentioned before you can use an old white pillow case (that’s what I did). A t-shirt will do as well and if you don’t have one you can buy it for a few bucks in your local Walmart, thrift shop or a dollar store.
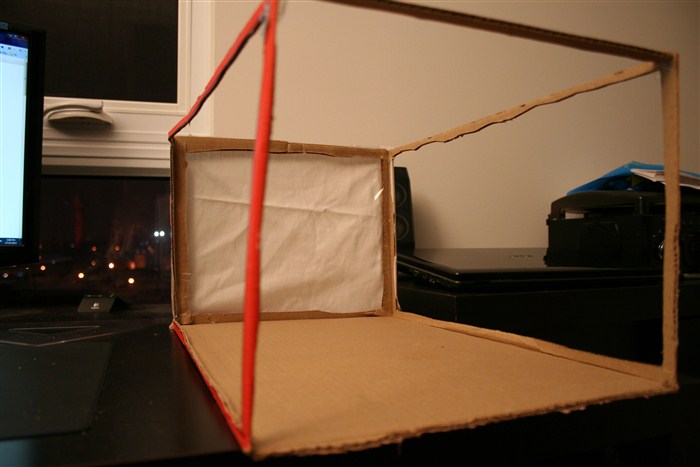
Once you cut the fabric attach it to the back of the box, the top, left and right sides. Leave the front of the box open since we need an opening to actually take photos through. Glue white paper at the bottom of the box and if you want “perfection” then glue white paper strips to the borders inside the box, to hide all the brown colors.
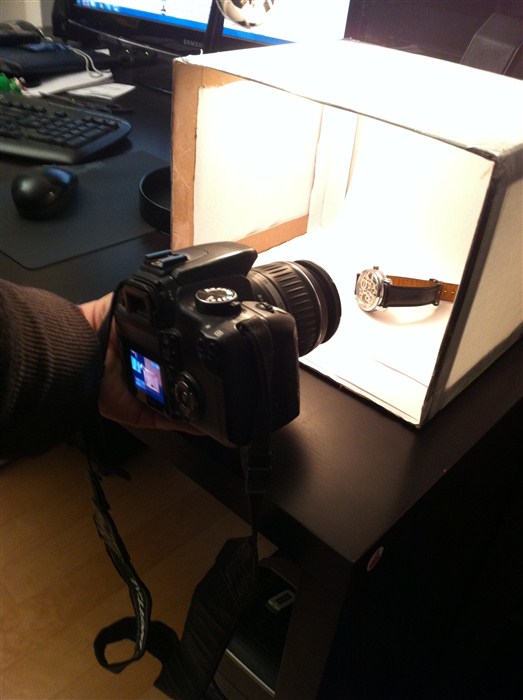
The Final Result
In the next pictures you would see a different box. It’s a smaller box for smaller items but the borders are thicker and the box is more stable.
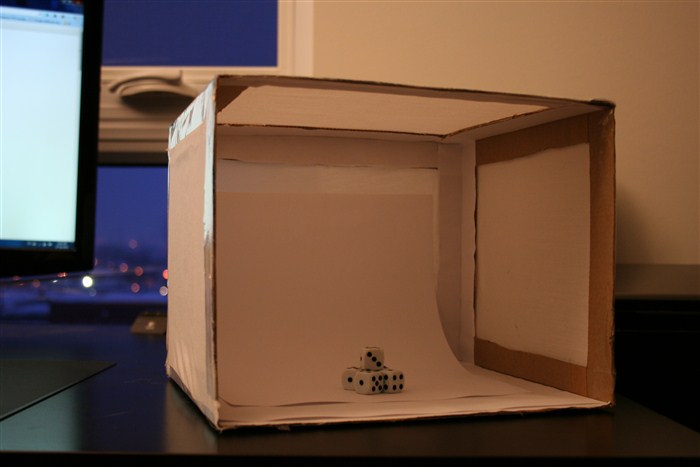
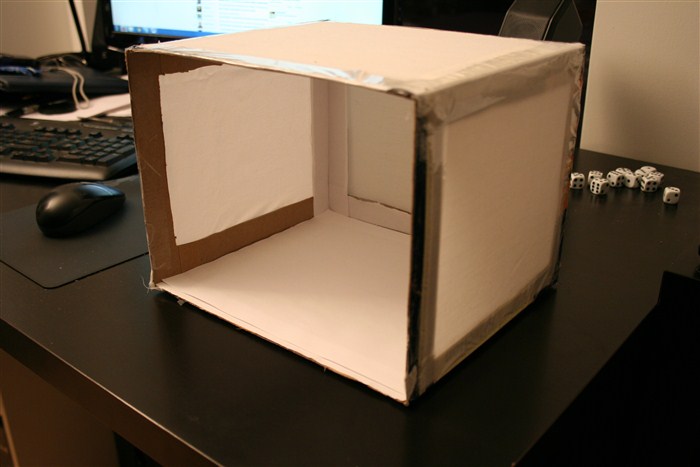
As you can see I attached the fabric with transparent tape. Also please notice in the first pic (with dice in the box) I also added a loose sheet of paper inside the box. It’s bent and it hides the back of the box, making the background a lot smoother. What’s really awesome about it is that you can replace that loose sheet of white paper by any other colored paper. In just seconds you can change the background color! How cool is that?
Step 2: The Light Source
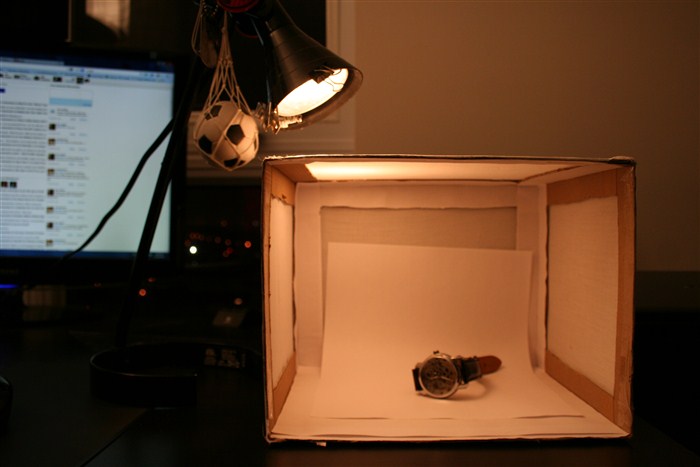
So we’ve got the box, now we need to “light it”. In the picture above you can see I am using a simple desk lamp (that was already on my desk). This is far from ideal set up but you gotta work with what you’ve got. At the moment of writing this tutorial I actually have two lamps, one on the left side and the other on the right side of the box.
Make sure that your background is lit evenly: it will save you a lot of time in editing later.
The Best Set-up
To get the best results you would need to use 3 lamps. When using a single lamp, you would see a shadow of your object. Play with a placement of the lamp (move it up or down, move it to the left, to the right, etc) to reduce the shadow as much as possible.
If you can use 2 lamps, you would create 2 shadows, however the shadows will be much smaller and a lot less noticeable. Using 3 lamps will help you eliminate the shadow completely making shadow-less shots. If you don’t have any lamps, check out your local thrift shop or Walmart for really cheap lamps. IKEA lamps could work well and you can find a few good ones for under $10. I highly suggest using at least 2 lamps.
I used the regular light bulb that was in the lamp, which is not ideal. Regular light bulbs are project yellow light which kind of ruins the whole idea of white background, however there is a way to deal with it and I’ll talk about it a bit later. If you want to spend a few dollars I’d suggest buying 100 Watts “Day Light” bulbs from Amazon or your local stores. These lights have slightly blueish glass instead of the regular transparent glass. A lot of painters and artists prefer these light bulbs as they project a more natural light than the regular light bulbs. Don’t worry too much about it though, you can start with a regular desk lamp and regular light bulbs.
Step 3: Using The Digital Camera
So you’ve got the box and the lights, now let’s get your camera ready! You can use your smartphone and some of the newer phones can offer incredible photo quality, however I am going with a regular digital camera for this tutorial. I am actually trying out 2 different cameras:
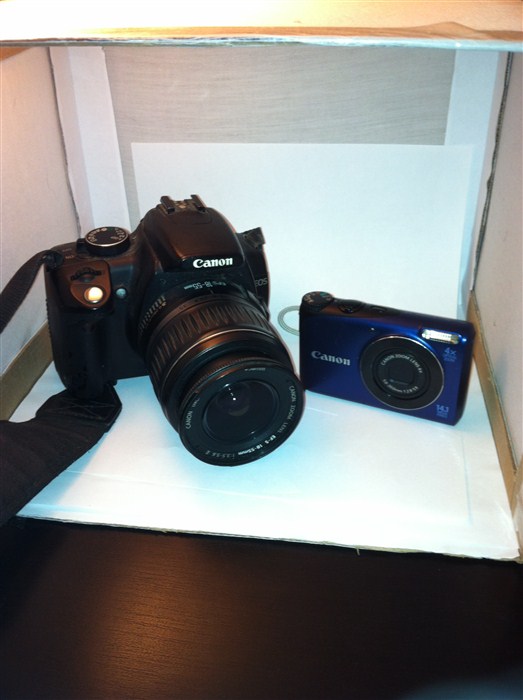
Canon Rebel XT. This DSLR camera cost me $800 in 2006! 11 years later it still works and I still like the photos it takes. You can probably find it used on eBay for $100-$200. Second camera is a cheap point-and-shoot Canon PowerShot A2200. Small, compact and basic camera. Can be purchased for $40 (used) -$150 (new) on Amazon.
To my surprise the little cheap camera managed to take better photos than the “more professional” Rebel XT. Technology is evolving and I guess I shouldn’t be surprised at the result. The point is, if you don’t already have a digital camera you can grab a used one for $40 and it’ll take pretty awesome photographs.
White Balance
Setting a white balance (WB) is a good idea however not all cameras will have this feature. Since I am not a photographer I cannot go to deep into the subject of white balance but I will give you a basic idea. We want our colors to be real and natural and proper white balance allows us to get there.
To set a white balance you need to remove your item from the light box and take a picture of the white sheet of paper that you put at the bottom of the box. Then you use that photo as a reference for the camera. The photo of that paper might look grayish, yellowish or blueish but you are telling your camera: “This is the REAL white, so whenever you see this color turn it into white”. Something along these lines.
This is how these settings look in the Rebel XT:

Surprisingly the cheap Canon also had a feature of setting custom white balance! Here is how it looks on the screen:
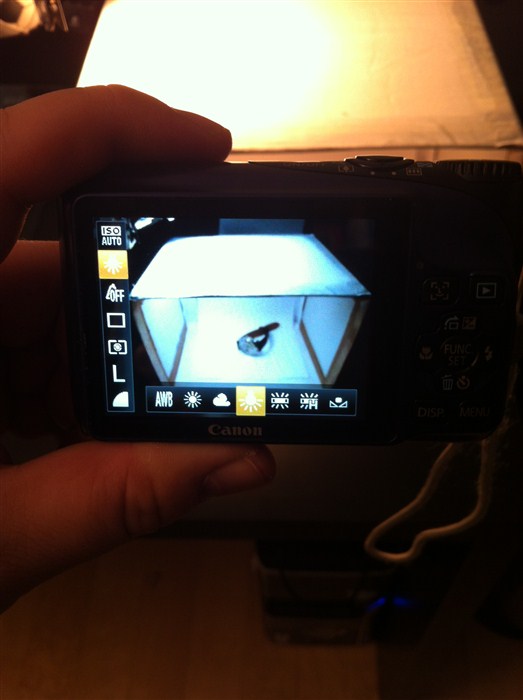
If your camera allows you to set the White Balance make sure to play with it. Many cameras don’t allow for a custom white balance but they offer a lot of pre-set white balances and you can play with those as well. Change the pre-set and take photos, whichever setting offers you the whitest background would be the best setting. Remember that this setting is not a set and forget. If you took some photos today, that WB will probably not work tomorrow (unless you are shooting at the exactly same time of the day and with the same lighting). Play with WB if possible and start taking photos.
Step 4: Editing Your Photos
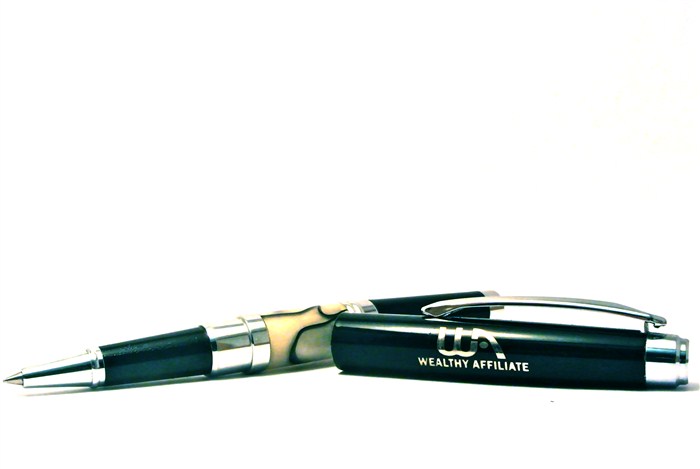
So you got the box, the lights, set a custom white balance and took a photo… which turned out to be NOT white. This is exactly what happened to me:
The picture is still a lot better than a picture with a distracting background. However, we want to it look “cleaner” and more professional. If you are taking shots for your listing on Amazon, this photo will probably not get approved.
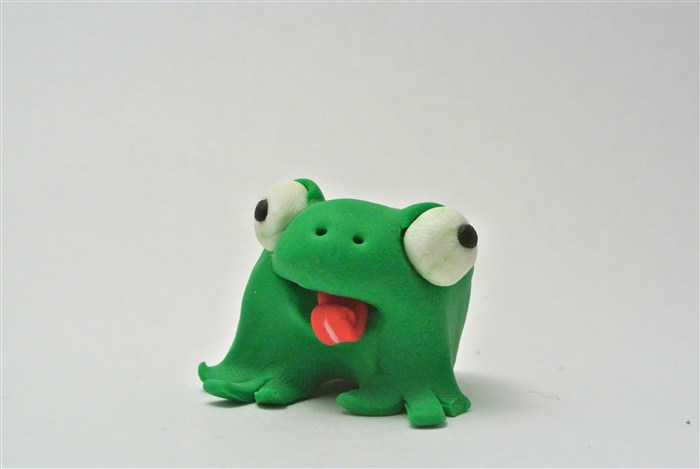
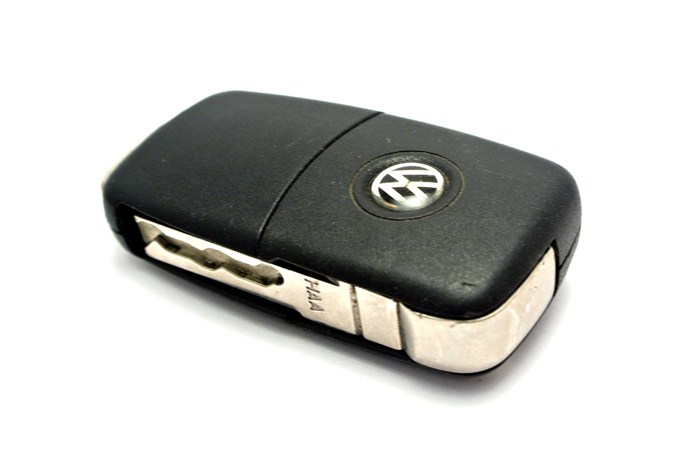
However, a few minutes in the photo editing software and we get a completely different result:

The difference is huge! And the best part? You don’t need to know photo editing to get these kind of results! I will take you by the hand and guide you through this quick and easy process of making your photo clearer and whiter.
I normally use Adobe Photoshop CS6 for editing and creating images. I have had this software for years but never learned how to use it properly. I know that the software is capable of doing miracles so whenever I need to do something I simply search Youtube for video tutorials. I have created logos, banners, buttons with PS, I watermark images with it and if you see an image on Extra Paycheck Blog – it probably went through Photoshop before ending up on my blog.
I understand that Photoshop is very expensive and not for everyone so I will be working with an awesome alternative.
GNU Image Manipulation Program, widely known as GIMP is open source and completely free of charge! You can download it here, on Gimp’s official website. Gimp is similar to Photoshop but it has less options making it a lot easier to use. I have not used GIMP prior to creating this tutorial so I was very surprised about the options and possibilities of it! Download and installation process are pretty straight forward and take only a few minutes. Let’s get to it!
1. Once you’ve installed GIMP, go to File -> Open and choose the image you need to modify;
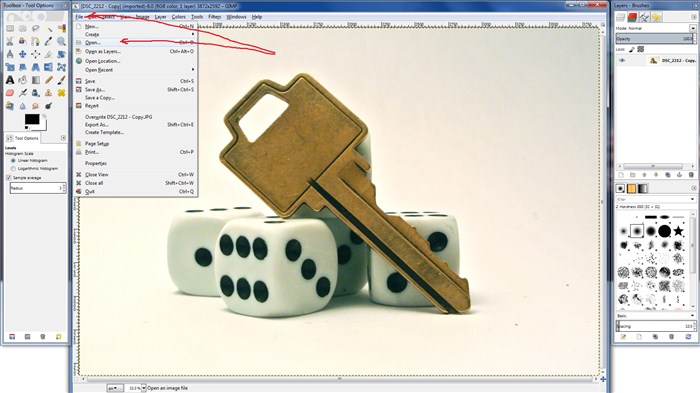
Once again, you can clearly see that the image is not white. There is some kind of pink/yellow color in the background. This is caused by a wrong White Balance and by the yellow light that was produced by my lamp with a weak light bulb.
2. Let’s Fix That Background
With your image opened in Gimp find the Colors button in the top menu, then click on Levels:
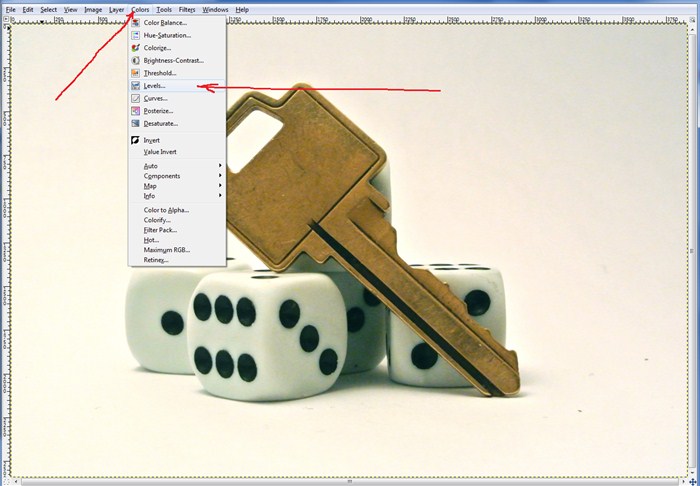
In the Levels menu you’ll have access to three different sliders under the Input Levels graph. These sliders will make your colors lighter or darker. If you move the far right slider (white) to the left – your image will start getting lighter. Move it until you are satisfied with the color of the background. The middle slider will make your object lighter or darker, move it around, see what looks right to you. The far right slider (black) also changes how the images looks. Test them out and see what gives you best results.
If you are using Photoshop, simply go to Layer -> New Adjustment Layer -> Levels and you’ll get access to a very similar menu.
Once you are satisfied with the background (and overall image colors) you would need to click the OK button, otherwise all these changes will be lost:

At this point you need to save the image. Simply go to File -> Export As… decide on a name for the file and the format, I like PNG and JPEG.

And that’s it! Your picture now has a sharp, white background and it’s ready to be posted wherever you need. This editing thing might seem complex but after you edit a few photos you’ll get the hang of it and it’s take you a minute to do all of that.
All of my photos came out with a non-white background from the camera, however this simple LEVELS trick helped me make them look a lot better. I did this adjustment very fast and unfortunately the white came out too “blown out”, this is why you need to play with your levels till the image looks perfect.

I hope you enjoyed this tutorial and I hope you’ll be able to create some amazing images because of it! Don’t forget to share this post 🙂
Comments? Question? Don’t be shy and you the comment box below, I love to hear from my readers.
– Alex